Posted on Leave a comment

Introducing Tensa4 Freestanding

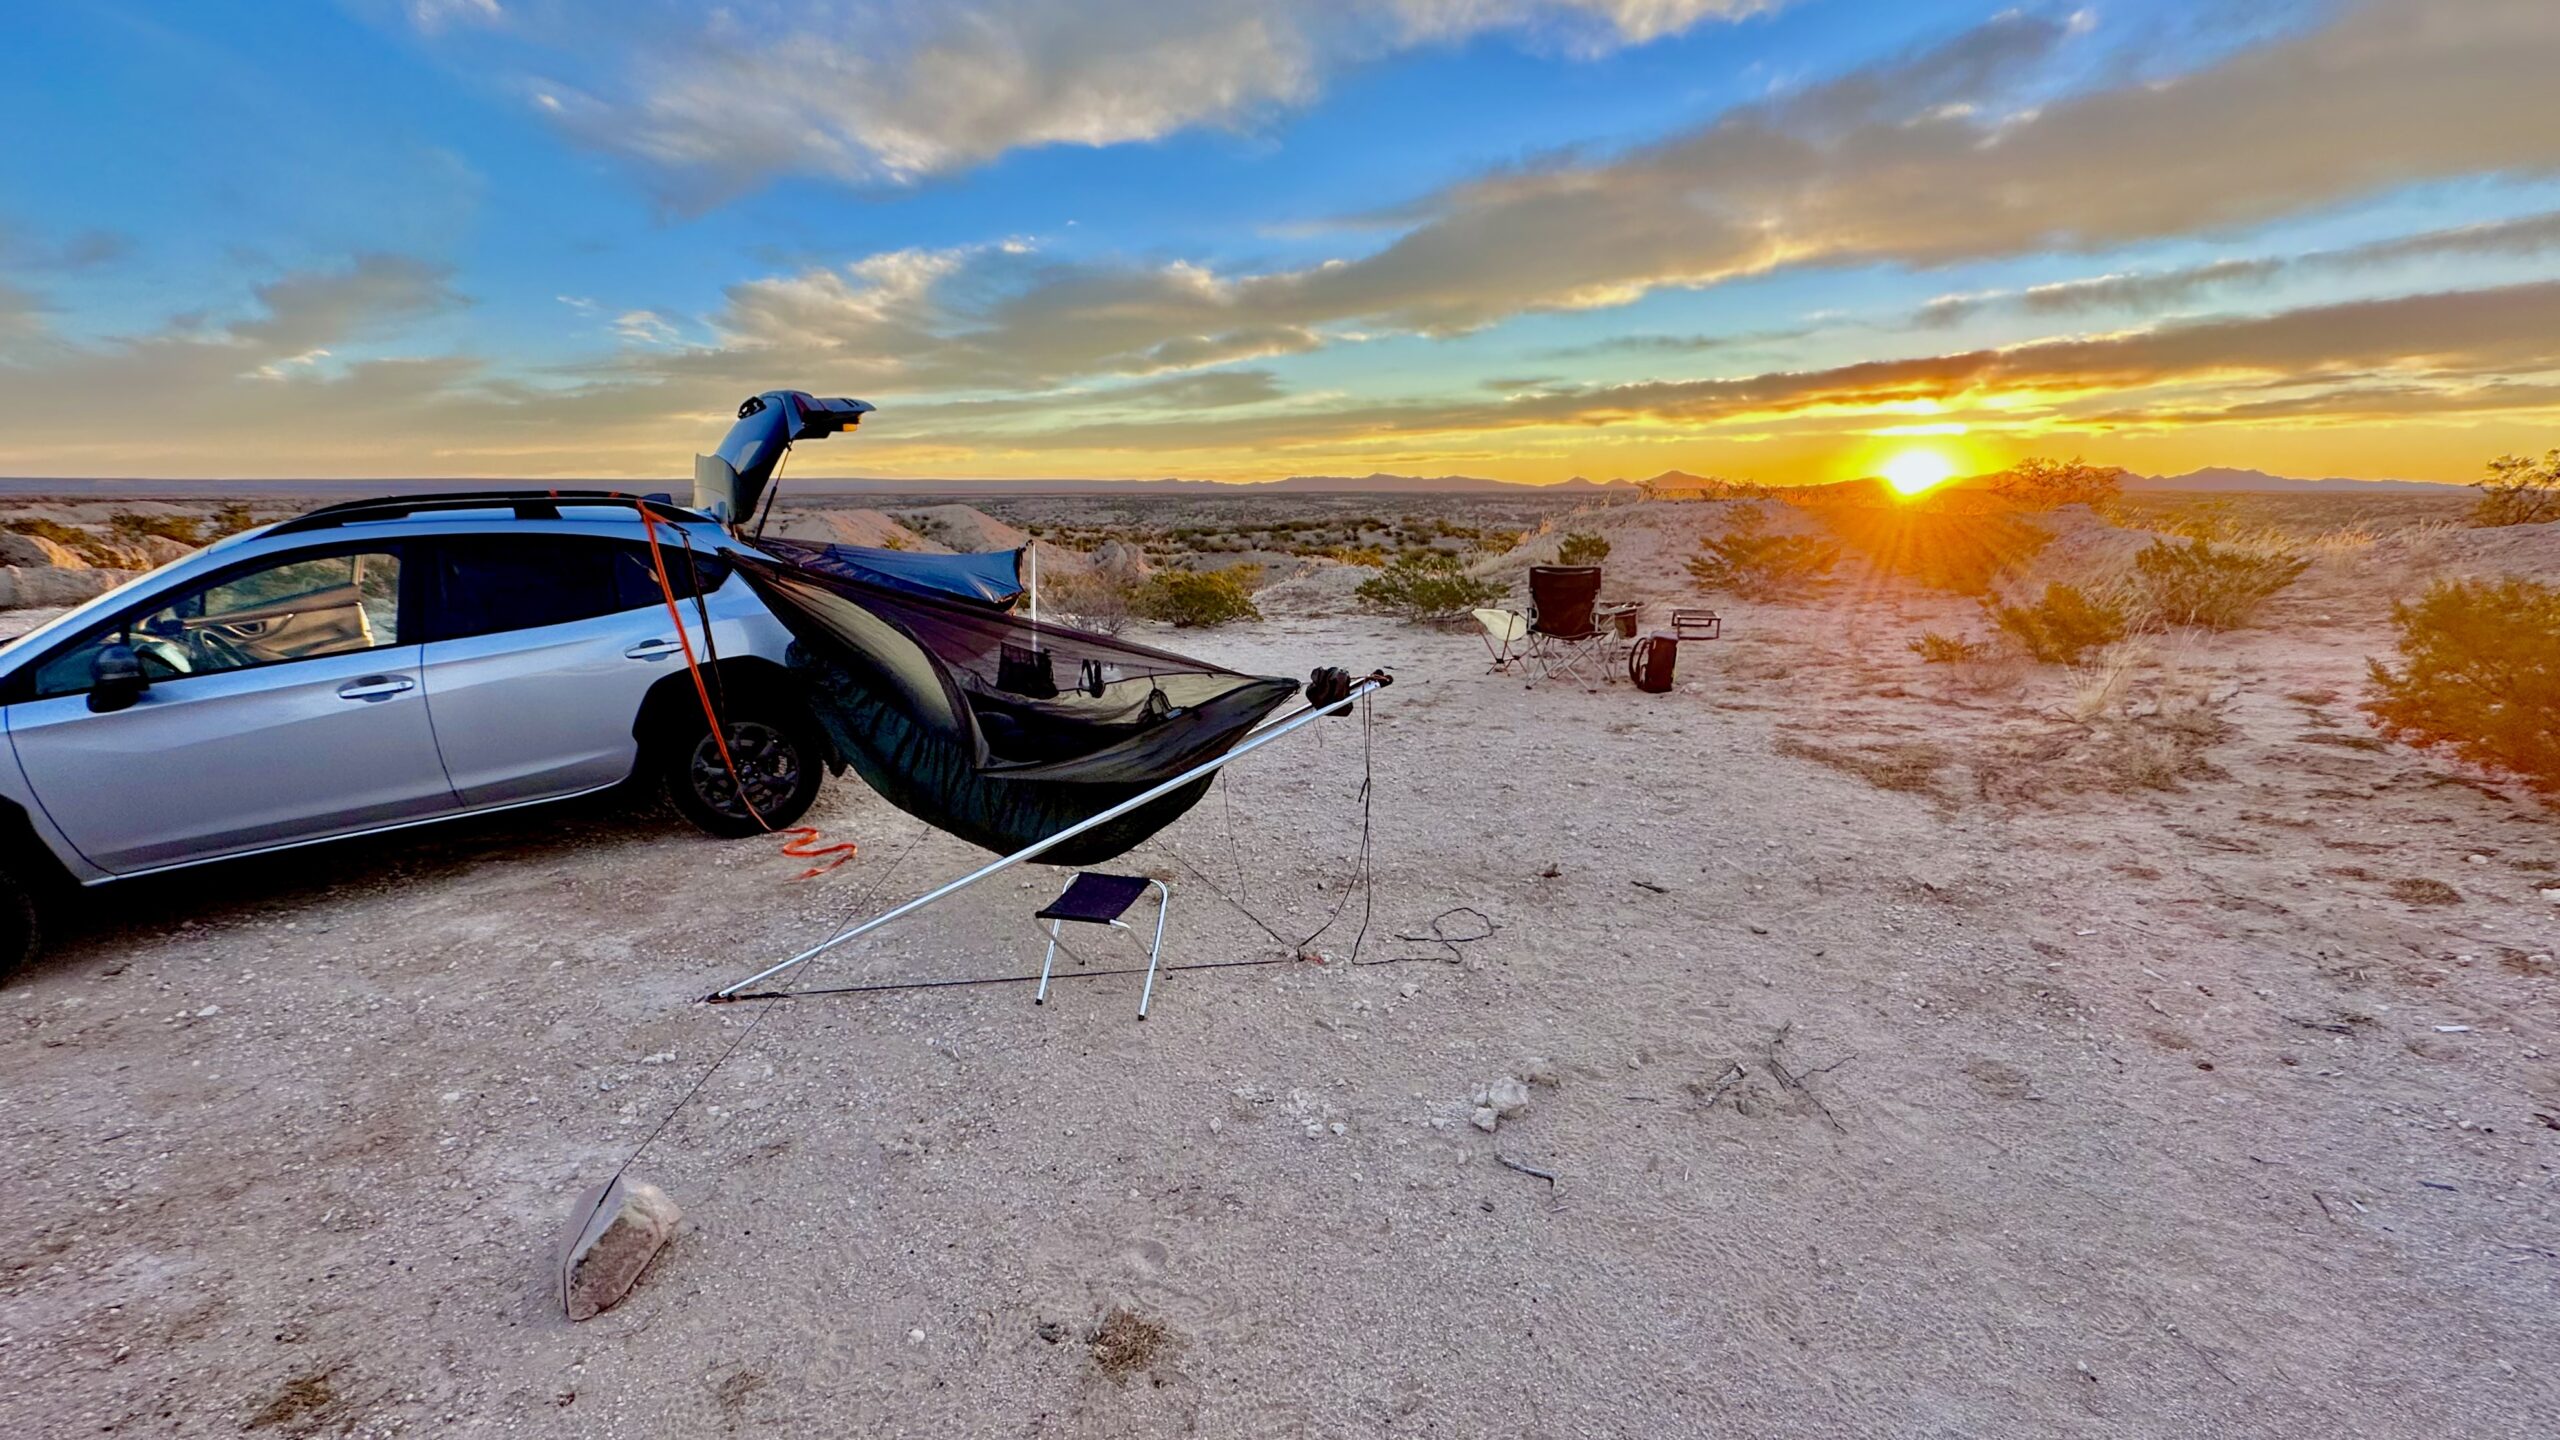
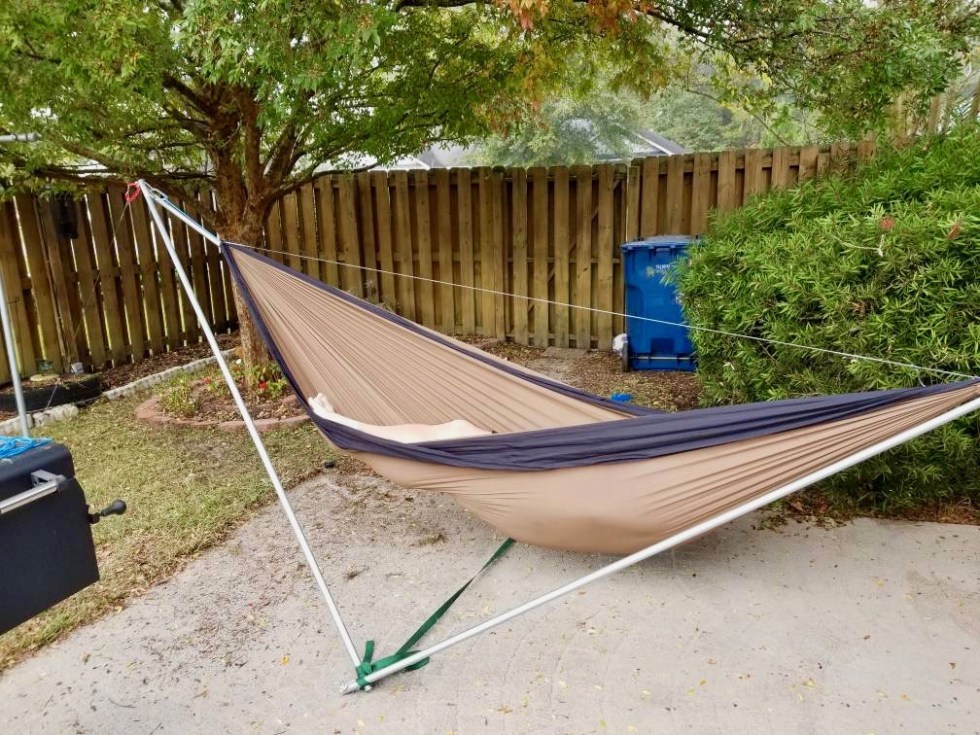
Over the past several months, we’ve been developing and testing a free-standing modification of our flagship Tensa4 hammock stand. We are now processing materials to offer this kit for sale in early 2025. We’ve shared most information so far across social media. This post compiles much of that into one place, also offering DIY tips.

Why Freestanding?

Our original Tensa4 design is well loved for its simplicity and versatility. With only two feet on the ground, it works well in tight spaces and on slopes, but relies on at least one guyline to remain stable. This is a dealbreaker for some, especially indoors where attaching guylines isn’t always practical.

We’ve been tinkering for years to make Tensa4 freestanding. Many schemes worked, but often sacrificed capacity, stability, portability, or ease of use. We made a breakthrough in August 2024 with a surprisingly simple approach. Behold!

Key features

  • Compact footprint: hangs a 12′ hammock properly in a room as small as 7′x9′. The tripod base, of only 17 square feet, allows placement in corners with the foot end floating over furniture.
  • Portable and lightweight: When packed without the standard Tensa4 guylines and anchors, Tensa4-FS weighs only 16 pounds and packs into a bundle 20″ long and 6″ around. One person can easily move the stand fully set up with hammock hung, with no need to reset guylines.
  • Adaptability and value: Like standard Tensa4, compatible with up to 12′ gathered-end hammocks, splittable to hang two hammocks from a single support like a vehicle, and converts into Tensa Solo for hiking. Very easy to tilt hammock to suit desired amount of height difference between ends, even to extreme “chair mode.”
  • Quick setup: Transforms from an easily stowable 5′ column into a full stand in about 30 seconds. Full setup or breakdown takes a few minutes.
  • Solid tree-like feel: With a more fixed geometry, Tensa4-FS provides a secure, stable hang that’s less sensitive to adjustment, site, and technique than standard Tensa4.

How it works

The standard Tensa4 design uses four poles in compression (gray), and three lines in tension (orange: baseline, ridgeline, and foot-side guyline):

Tensa4 Freestanding replaces the ridgeline with a ridgepole, and the foot guyline with a head support pole. This forms a tripod, while shortened foot-side poles shift the center of mass well into the tripod for excellent stability:

Limitations

While standard Tensa4 works with gathered-end, bridge, and transverse hammocks, we support Tensa4-FS only for gathered-end types. Standard Tensa4 also supports tarps very well, while tarp support for freestanding mode is less simple. At minimum, our Tarp Extensions for Tensa4 are required even for 11′ tarps. Five poles compete for space at the head apex, which is crowded. We think Tensa4-FS is most compelling indoors where tarps are not necessary. We suggest that users set up Tensa4 in whichever mode best suits their needs each time. There is no problem switching back and forth, as parts for both modes still fit in the carry bag.

DIY information

If you already own Tensa4, don’t want to wait for our modification kit, or you want to start with your own build, here’s what you need to know:

Ridgepole

  • Length: Should be 7-10% longer than the hammock’s ridgeline (e.g., ~120″ for an 11′ hammock). Our kit includes a 127″ ridgepole, suitable for most 12′ hammocks.
  • Material: 1″ EMT conduit should work. We haven’t worked out minimum diameters, wall thicknesses, material strengths to offer guidelines for various weight ratings. But our 9-stage telescopic ridgepole’s middle segment is 32mm OD, 1.5mm CS 6000-series aluminum, and we’ll warrant the kit up to 350lbs in the hammock.
  • Attachment: Ensure the ridgepole connects securely to the stand’s apexes while allowing movement to prevent binding. We thread our Amsteel ball loop connectors through holes in the tubes’ end fittings.

Head support pole

  • Size and strength: 48″ to 54″ tall, capable of bearing ~150 lbs. Options include stronger trekking poles like our Trekking Treez, our Tensa Solo, or tarp support poles. A broom handle? Our kit features a strap from the top with a height adjuster buckle, where the strap is also threaded into the connection point of the poles meeting at the head end.
  • Stability note: Always check that the head support pole is vertical before entering the hammock, especially on smooth or hard surfaces.

Foot side poles

  • Shorten the foot-side poles to about 87% of the head-side poles to improve stability, such as by not fully extending collapsible poles. Our kit includes newly designed feet to prevent damage to pre-2025 Tensa4 feet designs when loading incompletely extended poles.
Twinkly lights not included.
Posted on Leave a comment

Crowdsourced instructional video project [expired]

Update: Travis won in all categories, with the brief instructional videos now adorning our Tensa4 and Tensa Solo product pages.

We need video help, and we’re offering prize money. The photo above is to help this blog article get seen. We made a not-clear-enough video about how it’s done.

We are grateful for our many happy customers. This is in spite of our written product instructions, that seem always either missing detail, or too long to read. You’ve figured it out, but it should be easier. Most new customers and shoppers want video. We know that our own video production skills are not great, and that we are maybe too close to our products to see them with beginner eyes, to know what needs more or better explanation, and what doesn’t.

We know that many customers already turn to YouTube for help setting up. They find mostly reviews and sometimes shaky “first impressions” instead of confident detailed instruction. Some instructional material is mostly good with a few errors that make us cringe. Some otherwise good videos are obsolete because we’ve changed the product.

That’s why we’re asking you, our customers, to make videos we can compile into curated playlists, to help other customers learn from your experience. We’ll pay you for your effort and skills, and you can also promote your channel, brand, or passions along the way, as long as the focus remains on how to use our products. We hope to “seed the clouds” of our creative customer base instead of hiring hammock-indifferent professionals to make slick videos that don’t capture our customers’ proud enthusiasm.

We have always seen the variety of good ways to assemble and use our stands as a strength. Showing only one way to do things gives a false impression that it’s the only way. Meanwhile, a single video showing many ways to do similar things would be too long and confusing. So let there be many, with a variety of personalities, styles and settings more engaging than what we can muster!

Specifically, we want setup videos for each of our three hammock stands. Examples include, but are not limited to:

  1. Tensa4: first-time basic, on slopes, indoors in hotel rooms, with various hammocks including long and short gathered ends, and various “lay flat” types like bridge, Haven, Amok Draumr, showing different anchoring techniques on different challenges. Using Tarp Extensions. Splitting the stand to hang two from a single support. Joining several together. Wow us with your smooth two-minute setup from bag to reclining, or take a beginner by the hand the slow way through each hand step with clear closeup shots!
  2. Tensa Solo: Basic setup with a single pole and one tree, or two poles. Conversion from Tensa4. Anchoring strategies, including detail on all three of the kinds of anchors we offer, with both guyline types. Use with a bicycle or motorcycle as one support. Tensioning and milking the bury of Amsteel guylines, by wrapping the tails around the pole and pulling backwards for mechanical advantage!
  3. Tensa Trekking Treez: Basic and advanced setup/anchoring for backpackers. Conversion between trekking pole and hammock modes. How not to destroy your tarp lifters by always guying them out properly!

We will pay $100 for each video we choose to add to our public playlist for each of these three product categories, with no quantity limit. In addition, on Black Friday 2023, the entry we judge best in each of these three categories will receive $200, with a grand prize for the best single video of $500. Only one Black Friday prize per video. For example, let’s say you submit three videos that we list: you get $300. Then on Black Friday we deem your Bikepacking with Tensa Solo short the best in category: you get $200. But finally your Tensa4 split-stand kayaking video is so well done that we deem it best overall: you get $500. These add up to $1000 for the three you submitted.

We will link to your YouTube channel if you wish, so you can ad-monetize, maintain ownership, as you prefer. If we love your work and you’re willing to make more with edits going forward, we are open to a longer term business arrangement at market rates, because we keep changing things.

Rules for submission

  1. Product-specific instructional focus, not overviews, brand lifestyle/marketing, or reviews. There is some overlap, but our main goal is to help customers use our stands in detail, not to sell them. Making happy customers is our main marketing strategy, the ones whose setup experiences are easy enough even the first time, and who feel like experts after half a dozen outings. Help us show them. You may even teach us some new tricks that we can roll into print instructions.
  2. No single video longer than ten minutes. Imagine a person with one bar of phone signal trying to set up their stand for the first time without print instructions: make it worth any wait with tight editing. Multiple videos are fine, as long as edited to make sense without having watched others. Two-minute and even shorter portrait-mode videos welcome! What single problem solution or insight are you most proud to share?
  3. When showing close detail instead of broad concepts, the product must be substantially current. We change things often, because we are wired that way, but this contributes to our problem keeping instructions up to date. If you show us video-making skill with older product, we will very likely upgrade your gear to latest spec in hopes you will re-shoot. If you show one or two bad practices in an otherwise great video, we may ask you to edit or re-shoot. If in doubt about whether to show a certain technique, ask! We want you to succeed.
  4. Production quality: at least high amateur. Minimal camera shake, good focus and framing. Easy-to-follow whether scripted or ad lib; live or voice-over narration, or none (mimes get the job done for our worldwide customer base). Naturalistic and casual is our preferred style, but if you can edit in some effective graphical overlays, more power to you.
  5. G-rated. No socially contentious matter such as politics, profanity, controlled substances, firearms, etc. No depiction of unsafe or destructive practices, unless as a warning. Funny is great. People of all sizes, ages, conditions, ethnicities, sexualities or religions etc. warmly welcome.

How to enter? Just email us your YouTube link, public or unlisted.

Posted on 12 Comments

Make your own tensahedron stand

Bushcrafted on the spot, lashed connections. Published here previously, it’s just too beautiful not to re-use.

The idea behind our Tensa4 stand is so simple that inexpensive homemade versions are irresistible. There have been several dozen DIY builds shown online since we showed our prototype in October 2017. They can be hard to find in the ephemeral jumble of social media streams, with their poor search features, and build details are scarce. To help fix this, we present below three builds that seem to us especially good: simple, cheap, and not requiring fancy tools or skills to make.

Dane’s bare bones tensahedron

One of the earliest builds is still startling for low cost, at $21. Poster Daneaustin3 presented it in November 2017:

No stand ridgeline necessary when hammock has one.

In his own words:

3/4″ EMT conduit with 220lbs in it. I used steel cable to hold the conduit together.
Parts:
4x 3/4 conduit cut to 95″ (fits in my 8′ bed truck) $4.25 ea
4x 1′ steel cable $.36 per foot
4x cable clamps $.63 ea.
Total cost $21

Travis’s segmented fence top rail tensahedron

Hammocks not commonly seen in these here Utah parts.

Travis Hodgson (aka fivefreds), wasn’t the first to use fence top rail instead of EMT, but he did put up some good photos. Top rails are heavy and strong. These come typically 10′ long with one end swaged. Chop the pole in half for easier transport, and you can insert the swaged end into the middle to rejoin, securing with a pin. 10′ is more than long enough, so you might chop 3-10″ further off the sections.

Travis’s pole connectors are super elegant: continuous loops of Amsteel rope pushed through grommeted holes drilled in the pole ends, and then looped over the pole ends to secure.

It’s important to assure that the holes in the poles don’t cut the rope used to connect them. Grommets are a good idea, because steel can be hard to de-burr adequately. The coolest grommets I’ve seen are short pieces of copper tubing inserted through the holes and hand peened smooth:

Hard metal, meet soft metal. Artisanal peening.

Mike’s telescopic EMT conduit clothes line tensahedron

Save on power bills with this elegant laundry desiccation apparatus where permitted by homeowner covenant.

Mike Jones’ build uses two telescoping sizes of conduit to allow the poles to collapse to about half the full length for easier transport. Multiple stops make the poles adjustable length. The joint is near the middle, the weakest part of the pole, but 1″ steel conduit is pretty strong, and the overlap generous to take up much of the slop between EMT sizes.

The adjustable poles get just long enough to tension your tarp.
Round wire locks pin the poles at desired length.
Note how poles needn’t touch each other? Tensegrity design has compression members floating in tensioned lines.


In Mike’s words, edited:

Maximum length of each pole is 9’6″ and collapses down to 5’4″. Materials added up to about $50 provided you already have tools, hammock setup, and some 550 paracord.

Parts:

  1. Two: 10′ x 3/4″ EMT
  2. Two: 10′ x 1″ EMT
  3. 550 paracord (used to attach the two points that touch the ground together. As well as button knots on a loop, like MeyersTech ties, to run though the 3/8″ holes attaching the poles together.) This will likely be replaced by Amsteel or webbing over time.
  4. One: 1/4″ PEX tubing (I found a 5′ length to buy but I only needed 1.5″ or 2″ per hole in the EMT to create a bushing so the paracord is not cut by the EMT. I had to heat the end of the PEX over a candle to flair it out.)
  5. Various hammock straps and lines to attach the hammock and tarp
  6. Eight: Rubber Leg Tips. I used 3/4″ tips for the 3/4″ tubing but I would likely buy 1″ tips if I make it again. Then I used 1-1/8″ tips for the 1″ tubing. Then I placed 1″ and 1-1/4″ fender washers inside the rubber leg tips so the EMT tubing does not cut through.
  7. Four: 3/8″ x 1-5/8″ Round Wire Locks. These are to secure the telescoping poles at various lengths while in use and in the compact mode for transportation.

I used the 9’6″ set up for my 12′ tarp, and it worked great, but a shorter pole length would also work. If you keep the two poles that touch the ground at 90° to one another, the following table of pole lengths will be a good estimate of ridgeline (hypotenuse) length. There is plenty of wiggle room here, but it gives you a starting point.

Pole Ridgeline
9.5′ 13.4′
9′ 12.7′
8.5′ 12.0′
8′ 11.3′
7.5′ 10.6′
5.5′ 7.8′
Tensa4 is our trademark, Mike! We call other builds tensahedrons (tensegrity+tetrahedron).

Want another EMT version that packs even smaller? See US soldier Kamileon’s build.

Other approaches

In addition to steel, DIY tensahedrons have been made from wood, bamboo, fiberglass, aluminum, and carbon fiber.

The pole material determines the necessary diameter for enough strength. For about 300lbs in the hammock, 3/4″ is adequate for most steel including EMT conduit. 1.5″ is likely enough for aluminum in wall thicknesses above 1mm. Wood and bamboo can be very beautiful, but as irregular natural materials, it is important to select carefully: 2 inches is a prudent minimum for clear wood (no knots, straight grain) or structurally sound bamboo.

The poles must be joined at their ends into a diamond shape, with none of the joints having fixed angles, but instead floppy, permitting the poles to assume any angle, and to rotate at least several degrees. We favor rope loop connectors as simple and field serviceable, but various combinations of hardware and even lashing can also work. Avoid using hardware that can put bending moment on the poles when loaded, such as eye bolts protruding from the sides of the poles: poles should be in pure compression, lines in tension.

Joints along the poles can be points of failure, especially near the middle. Best to use either very strong materials, split into an odd number of segments, or both. (Tensa4 poles are divided into 7 segments, with the largest diameter in the middle).

Why are we telling you this?

As a company, our focus is on products offering value beyond what people can easily make for themselves. Why promote cheap alternatives to buying our stuff?

Apart from us doing all the work, burdening nobody with the task of reading long blog posts, the special value of our Tensa4 stand is how we’ve made it pack so small and light: carry-on airline luggage, easy to pack on a bike with a motor or not, in a subcompact car, Cessna 150, kayak, or even a backpack. We realize that this amount of portability isn’t worth the price to everybody, especially large families seldom far from large vehicles, scout troops, extremely cool small national armies, or people who want only a home solution. We can’t compete with your local hardware store for basic poles if you’re willing to contribute labor. We truly love helping people get off the ground with hammocks, especially where they couldn’t without this design.

Meanwhile, we figure the more people embrace the basic design, the more interest may turn to our packable dialed-in version, in 28 segments of custom made telescoping aluminum, keyed and anodized, not available at Home Depot. Quite a few of our customers, in fact, made one or more stands themselves before buying Tensa4.

Freestanding postscript

Lots of people are put off by the anchoring requirement of a classic tensahedron. Well, you can swap two lines for poles and make a completely free-standing version. Check DIY details given here: Introducing Tensa4 Freestanding/.